
SellCarAdvisor is reader-supported, when you sign up through links on this post, we may receive compensation at no extra cost to you. How We Work.
The bottom line: A thorough car cleaning before selling can increase your resale value by approximately 5 to 10%. Spending $50 to $150 on DIY supplies vs. $150 to $300 for professional detailing can deliver strong results when done properly.
Our step-by-step guide helps you achieve professional-quality results at home in about 4 to 6 hours.
Key Takeaways
- Use the two-bucket method when washing: one bucket for soapy water, one for rinsing your mitt. It’s the single biggest thing that prevents paint scratches.
- Work top to bottom on both interior and exterior. Starting low means grit from wheels and lower panels ends up on areas you’ve already cleaned.
- Detailing matters most for private sales. Dealers and instant offer buyers factor in reconditioning costs regardless of how clean your car is.
- Windows, wheels, and odor make the biggest first impression on buyers during a showing.
- Clean 1 to 2 days before showing the car, then do a quick 15-minute touch-up right before the appointment.
- If you’re not selling privately, skip the deep clean and just compare offers from multiple services with Sell Car Advisor to see who gives you the most.

Compare Instant Offers
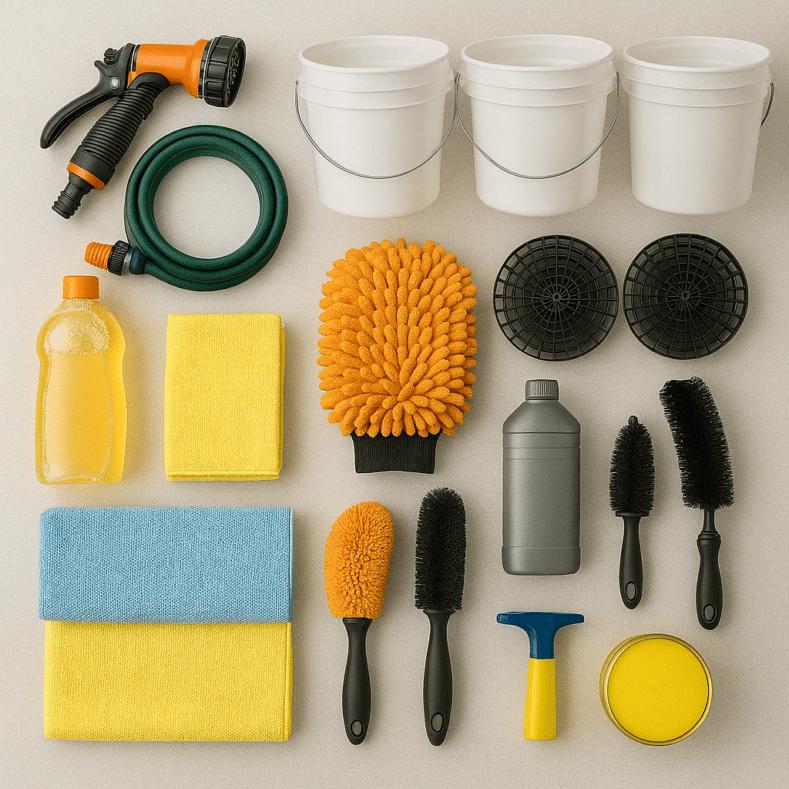
Preparation: Gathering Essential Supplies
Before starting your car cleaning project, you’ll need to gather the right supplies. Having everything ready will save time and ensure good results.
Essential exterior cleaning supplies:
- Garden hose with adjustable nozzle
- Three buckets (body washing, wheel cleaning, rinsing)
- Grit guards for buckets
- Microfiber wash mitts (separate ones for body and wheels)
- Microfiber drying towels
- Quality car shampoo
- Wheel and tire cleaner
- Wheel brushes (various sizes)
- Window cleaner
- Car wax
Essential interior cleaning supplies:
- Vacuum with attachments
- Microfiber cloths (multiple)
- Interior surface cleaner
- Upholstery cleaner
- Glass cleaner
- Detailing brushes
- Cotton swabs
- Odor eliminator

Optional advanced supplies:
- Clay bar kit
- Polishing compound
- Headlight restoration kit
- Steam cleaner for upholstery

Exterior Cleaning: Step-by-Step Process
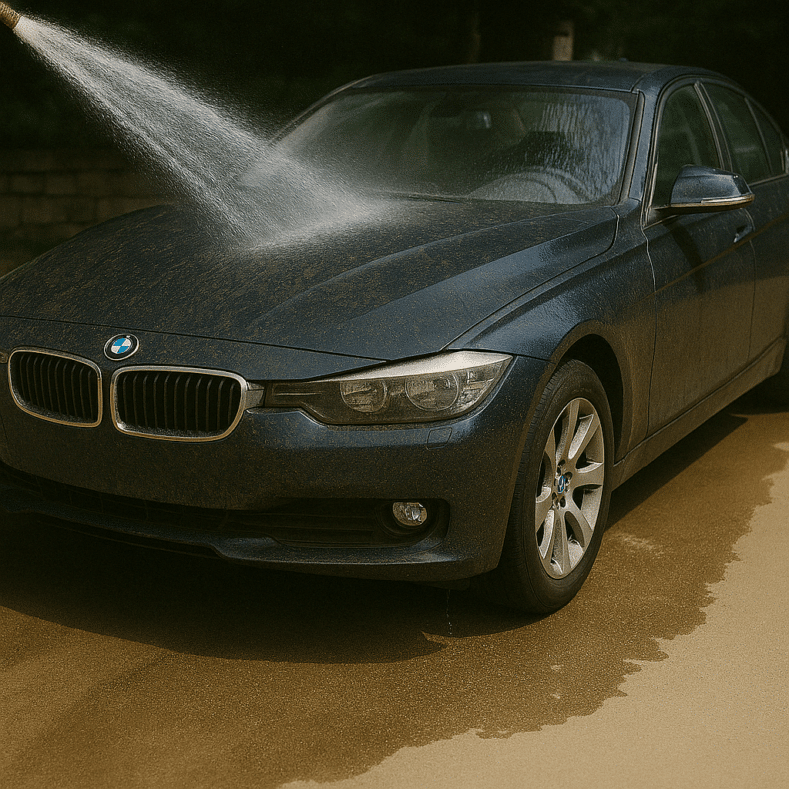
Step 1: Pre-Wash Preparations
Position your car in a shaded area away from direct sunlight. This stops cleaning solutions from drying too quickly and causing streaks. Give your car a thorough initial rinse to remove loose dirt, dust, and debris.
For heavily soiled vehicles, consider a pre-wash treatment to loosen contaminants before the main wash. Options include citrus pre-wash, snow foam, or pH-neutral pre-wash. This step reduces the risk of scratching your paint during the contact wash.
Step 2: Two-Bucket Washing Method
The two-bucket method is the standard for preventing scratches while washing:
- Fill one bucket with car shampoo and water
- Fill a second bucket with clean rinse water
- Dip your microfiber wash mitt in the soapy water
- Wash from the top down, working in sections
- After each section, rinse your mitt in the clean water bucket
- Repeat the process until the entire car is washed
Thoroughly rinse the car with clean water after washing to remove all soap residue. Pay attention to crevices, trim, and around windows where soap can linger.

Step 3: Proper Drying Techniques
Dry the car immediately to prevent water spots. Use clean microfiber drying towels with long, sweeping motions or a gentle pat-drying technique.
For even better drying results that reduce direct towel contact with the paint, consider using a leaf blower to remove most of the water first.

Step 4: Applying Wax for Maximum Shine and Protection
Applying a quality car wax gives your car a high-gloss shine and adds protection. Different wax types offer varying benefits:
| Wax Type | Gloss Level | Durability | Ease of Application | Typical Longevity |
|---|---|---|---|---|
| Carnauba | High | Low to Medium | Medium to Hard | 1 to 2 Months |
| Synthetic | High | Medium to High | Easy to Medium | 3 to 6 Months |
| Hybrid | High | Medium to High | Easy to Medium | 2 to 4 Months |
| Ceramic | Very High | High | Medium | 6 to 12+ Months |
Apply wax to a cool, clean, completely dry car in a shaded area. Use a clean foam applicator pad and apply a thin, even coat in circular or overlapping motions, working one panel at a time.
Allow the wax to haze according to manufacturer instructions, then buff off with a clean microfiber towel.

Step 5: Wheel and Tire Detailing
Dirty wheels and tires can hurt your car’s appearance a lot. For proper cleaning:
- Rinse wheels thoroughly with a hose
- Apply wheel cleaner suitable for your wheel type (alloy, chrome, painted)
- Use wheel brushes to reach all areas, including inside barrels
- Rinse thoroughly to remove all cleaner and brake dust
- Clean tires with dedicated tire cleaner and stiff brush
- Apply tire shine product evenly using an applicator pad
- Wipe off excess product for a less glossy finish or to prevent sling
Clean, shiny wheels and tires make a big positive impact on a buyer’s first impression.

Step 6: Window and Mirror Cleaning
Clean, streak-free windows and mirrors improve both appearance and safety. Use an ammonia-free glass cleaner, especially for tinted windows.
Apply the cleaner either directly to the glass or onto a microfiber towel, then buff dry with a clean microfiber towel.
Tip: Wipe exterior windows using vertical motions and interior windows using horizontal motions. This makes it easy to tell whether any streaks are on the inside or outside.

Interior Cleaning: Creating a Showroom-Fresh Cabin
Step 7: Decluttering and Thorough Vacuuming
Start your interior cleaning by completely decluttering the car:
- Remove all personal belongings and trash
- Empty storage compartments, glovebox, trunk, and door pockets
- Take out floor mats for separate cleaning
Once everything is removed, vacuum thoroughly:
- Start from the top (headliner) and work down
- Use crevice tool for tight spots between seats and console
- Use upholstery brush attachment for seats and carpets
- Move seats fully forward and back to reach all areas
- Use compressed air for stubborn dust in vents and crevices

Step 8: Interior and Carpet Cleaning
Different upholstery materials require different cleaning approaches:
Fabric upholstery:
- Blot dry from outside in to prevent spreading
- Consider steam cleaning for deep stains
- Pre-treat stains with upholstery cleaner
- Clean with mild soap solution or specialized cleaner
- Gently scrub with soft-bristled brush
Leather upholstery:
- Buff dry with clean cloth
- Apply leather conditioner to prevent cracking
- Dust with microfiber cloth
- Apply pH-balanced leather cleaner
Vinyl upholstery:
- Use soft brush for textured areas
- Apply vinyl protectant after cleaning
- Wipe with damp cloth
- Use vinyl-specific cleaner
Step 9: Dashboard and Hard Surface Detailing
For a truly polished look:
- Dust all surfaces with microfiber cloth
- Use detailing brush for vents and crevices
- Apply appropriate cleaner for each surface type
- Clean cupholders and storage areas thoroughly
- Wipe down door panels and armrests
- Clean steering wheel and gear shift
- Use cotton swabs for intricate areas and buttons
- Apply plastic protectant to restore color and shine

Step 10: Odor Elimination
A fresh-smelling interior is important for test drives:
- Remove odor sources (food, spills, etc.)
- Air out the car by opening windows on a sunny day
- Sprinkle baking soda on carpets and upholstery, let sit overnight, then vacuum
- Clean hard surfaces with vinegar solution (1 part vinegar to 1 part water)
- Replace cabin air filter
- Use activated charcoal or coffee grounds as natural odor absorbers
- Consider commercial odor eliminators for persistent issues

Final Touches for Maximum Impact
Before listing your car for sale:
- Clean engine compartment (cool engine, cover electronics, apply degreaser, rinse, dry)
- Clean door jambs, trunk, and hood hinges
- Organize and clean glovebox with owner’s manual visible
- Apply touch-up paint to minor chips if needed
- Ensure all bulbs are working

Should You Clean Your Car Before Selling?
A deep clean matters most if you’re selling privately. Buyers who view your car in person are comparing it directly to other listings, and a clean car stands out fast.
If you’re getting an instant offer from an online buyer, the cleaning will have less impact. Those buyers factor in reconditioning costs regardless of how clean the car looks. A basic clean is still a good idea for photos, but a full 6-hour detail won’t change your offer much.
Once you’re done cleaning, take photos and write your car listing while everything looks its best. Then get quotes to see what buyers will actually pay.
Compare Instant Offers
Compare Instant Offers
FAQ: Car Cleaning Before Selling
Is professional detailing worth the cost when selling my car?
Professional detailing typically costs $150 to $300 compared to about $50 to $150 for DIY supplies. For private sales, a thorough DIY clean can deliver solid results and save you $100 to $250 that goes into your pocket when you sell.
For dealer trade-ins or instant offer buyers, a professional detail usually won’t change the offer. Dealers build in reconditioning costs on every car they buy.
How much time should I plan for cleaning my car before selling?
Plan for 4 to 6 hours for a complete interior and exterior cleaning. Breaking it into smaller sessions makes it more manageable. Doing the exterior one day and the interior the next works well for most people.
What areas do buyers notice most when viewing a used car?
Buyers typically notice these areas first: dashboard cleanliness, upholstery condition, door jambs, trunk cleanliness, and wheel condition. These spots deserve extra attention when cleaning before a showing.
How long before my scheduled showing should I clean the car?
Clean your car 1 to 2 days before showing it, then do a quick 15-minute touch-up right before the appointment. Avoid driving in bad weather or on dirt roads after cleaning.
What cleaning step makes the biggest difference when selling?
Clean windows make one of the biggest differences in both appearance and buyer perception. Streak-free windows and mirrors instantly make a car feel newer and better cared for.
Odor elimination is equally important. A bad smell can kill a sale faster than visible dirt can.
Does cleaning a car before selling actually increase the price?
For private sales, yes. Research suggests a thorough clean can increase what a private buyer is willing to pay by approximately 5 to 10%. For a $15,000 car, that’s $750 to $1,500 more in your pocket.
For dealer trade-ins and instant online offers, the effect is much smaller. Those buyers price based on market value and condition reports, not curb appeal alone.

Article Update History
Professional detailing costs were verified against current industry sources and updated to $150 to $300 for a full interior and exterior service. The 5 to 10% resale value estimate was confirmed by current automotive market research. DIY supply costs were adjusted from a flat $50 to a $50 to $150 range to reflect realistic startup costs.
Originally posted and shared with our readers.